Getting started with Specz ISP
This guide assumes installation is complete and initial network setup is done. It shows you how to create a subscriber plan, add a subscriber, and apply your changes.
Step 1: Create a subscriber plan#
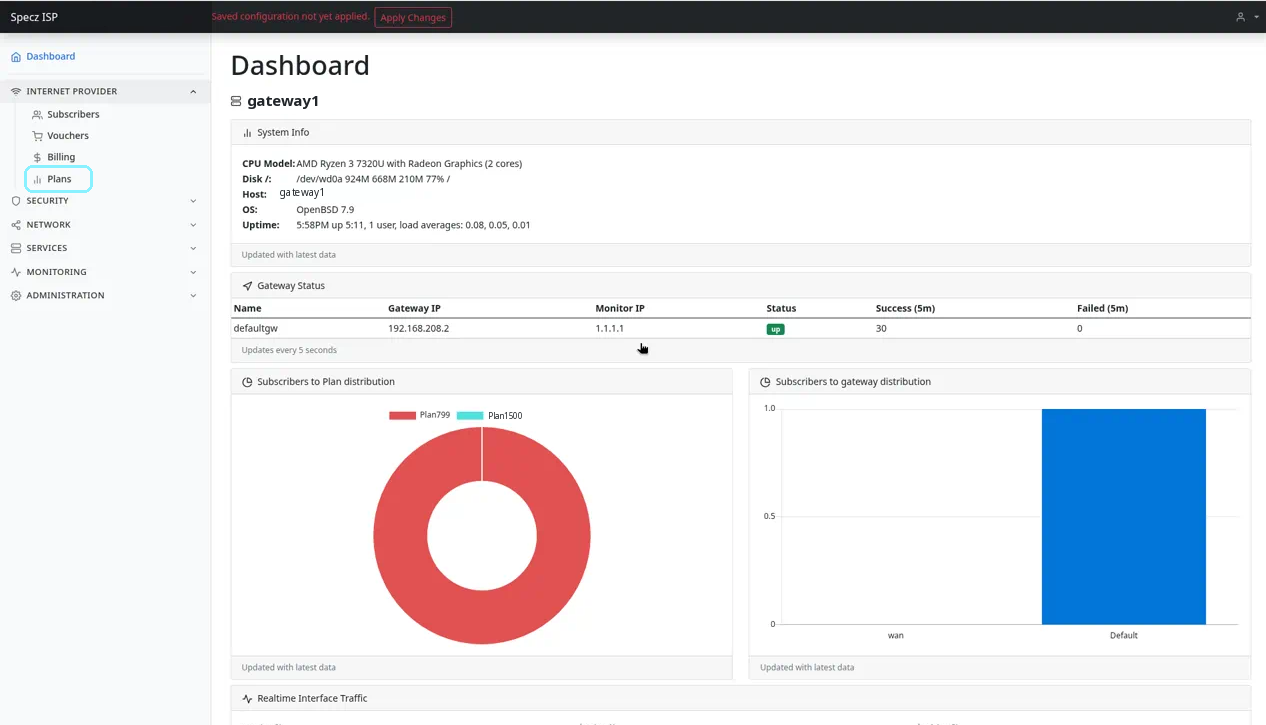
- In the left menu, go to Internet Provider > Plans.
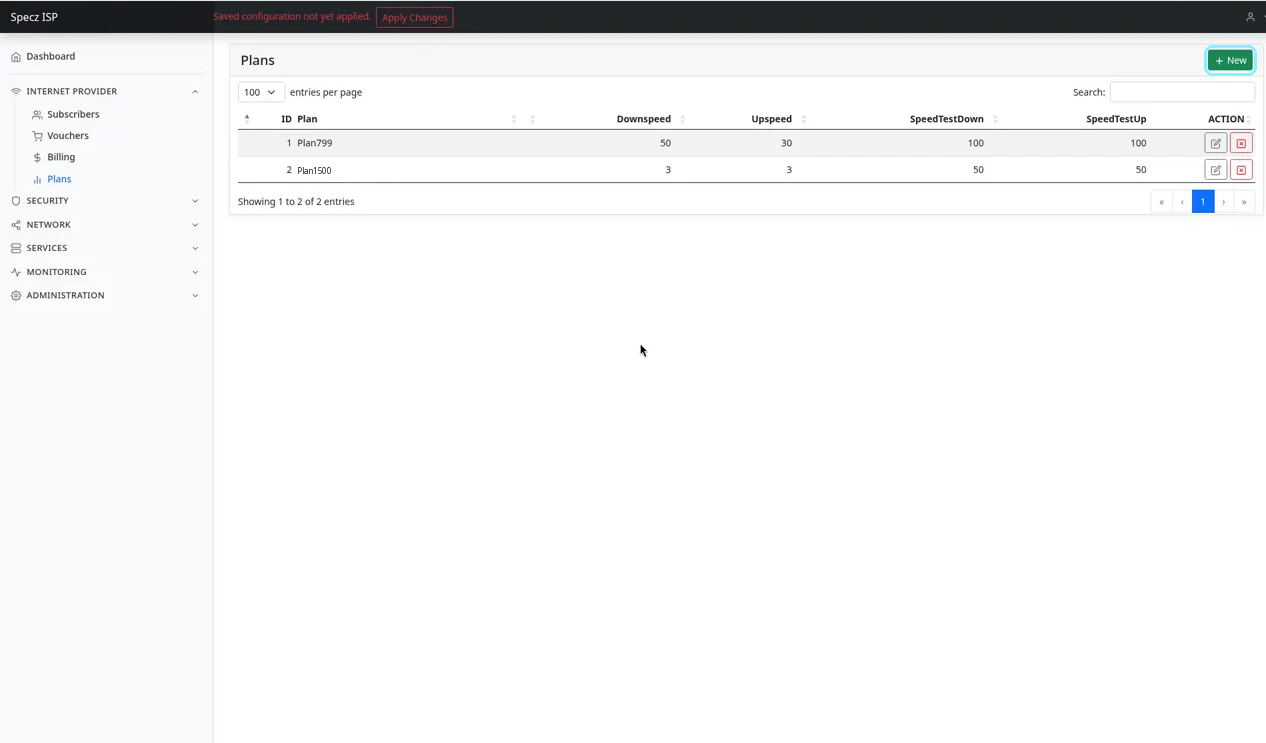
- The Plans page lists your existing plans. Click + New to open the new plan form.
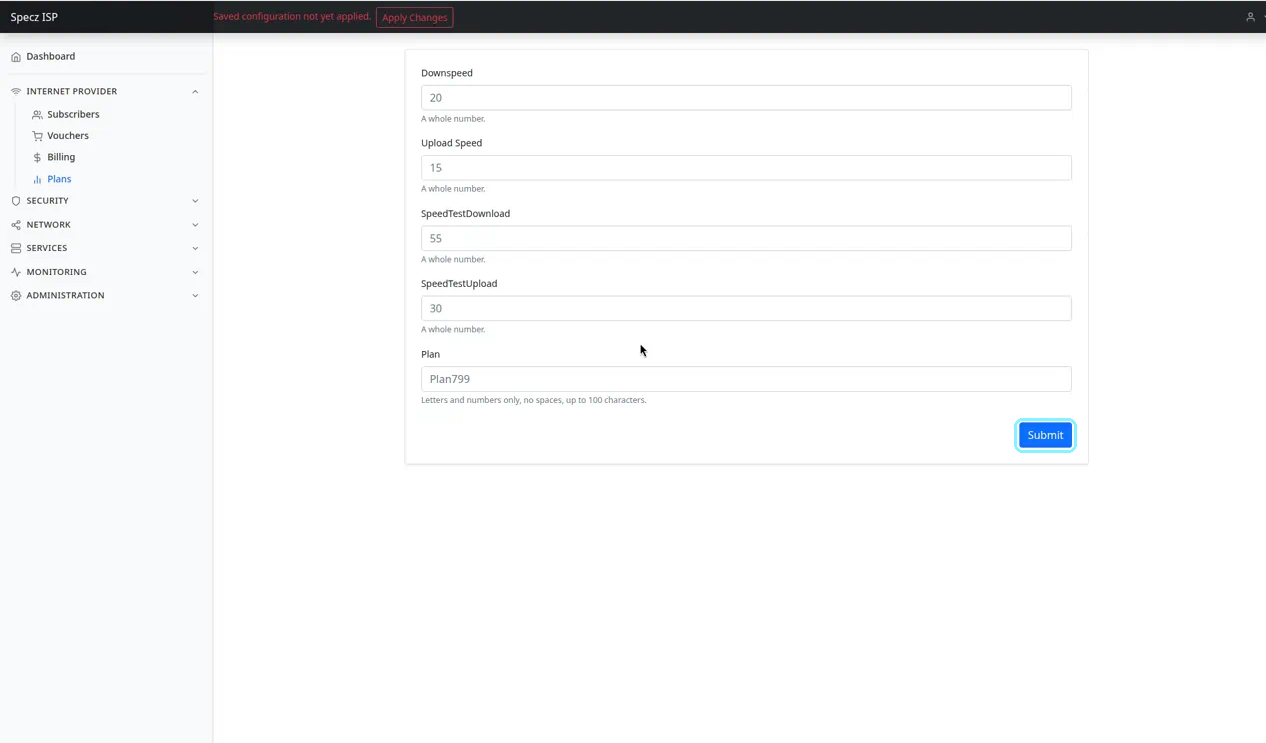
- Fill in the fields:
- Downspeed
- Upload Speed
- SpeedTestDownload
- SpeedTestUpload
- Plan (the plan name)
Each speed field takes a whole number.
- Click Submit.


Important: plan naming rule
The plan name must be Plan<amount>, where <amount> is the monthly price the subscriber pays you, the ISP operator. For example, a plan that costs 799 per month must be named Plan799. Use letters and numbers only, with no spaces.
Step 2: Create a subscriber#
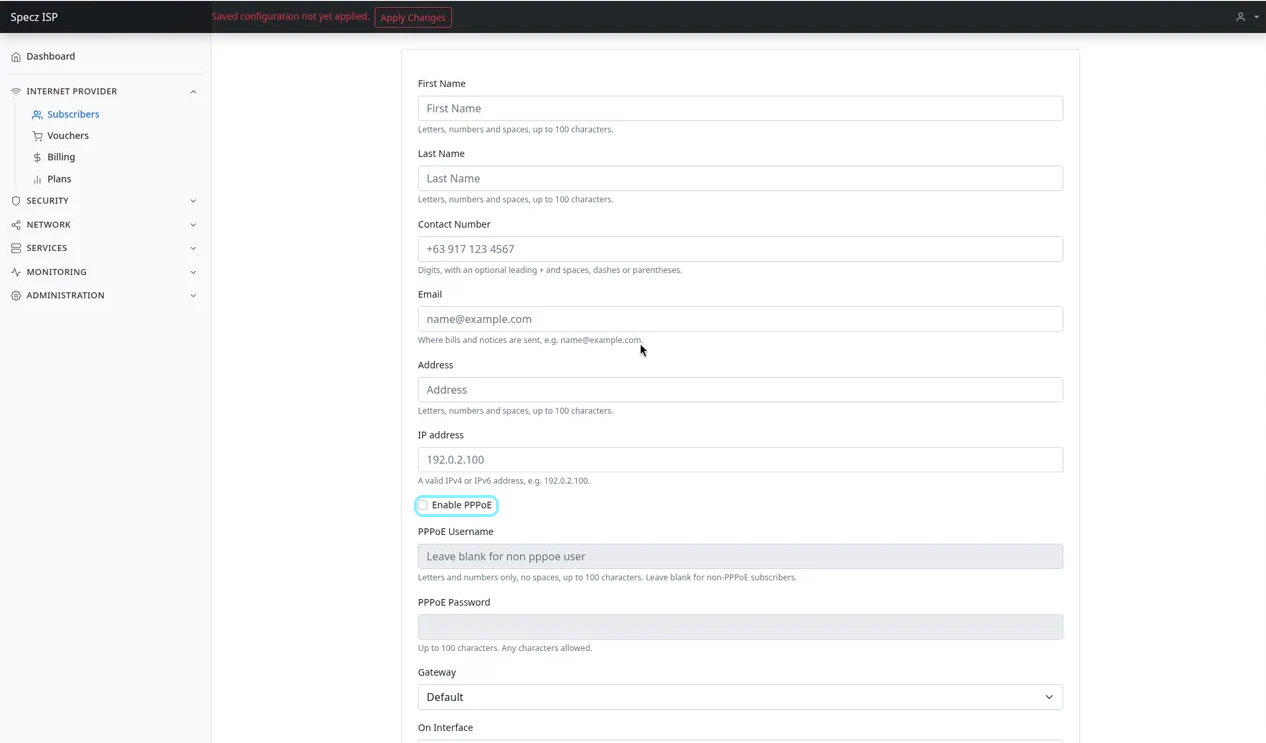
- In the left menu, go to Internet Provider > Subscribers, then click + New to open the new subscriber form.
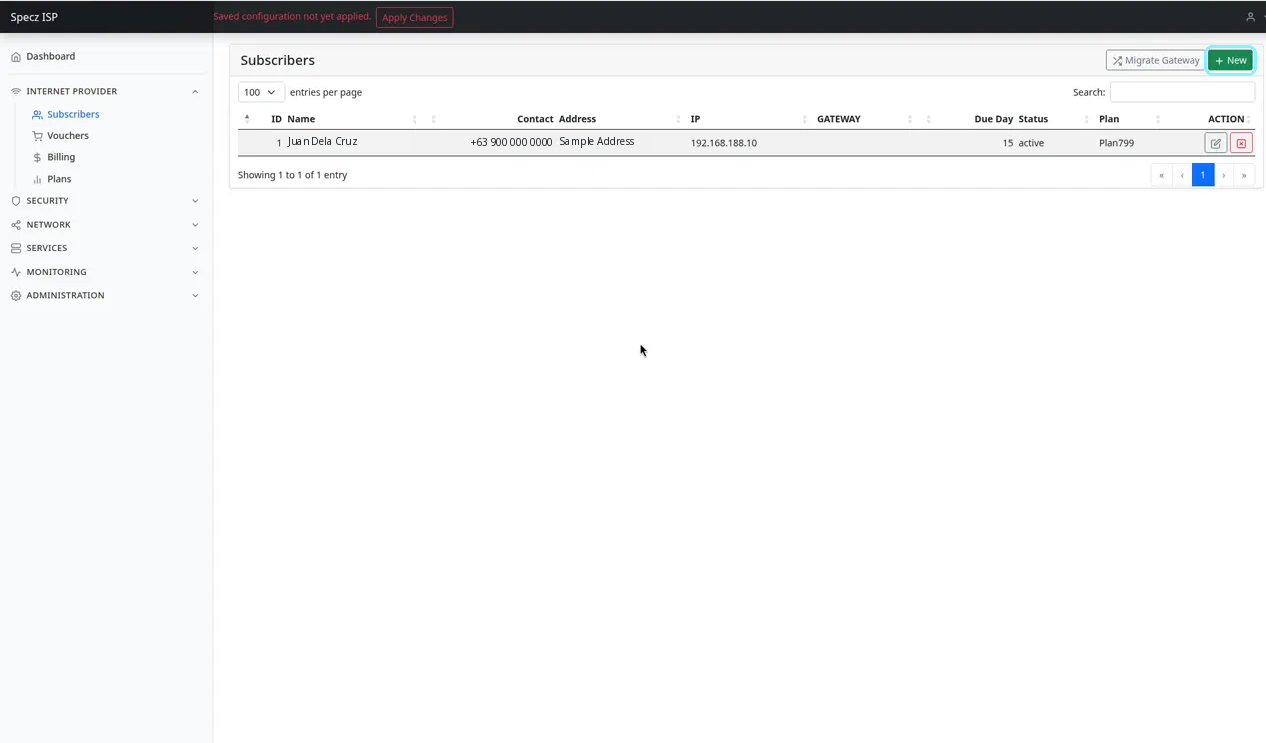
- Fill in the required fields:
- First Name
- Last Name
- Contact Number
- IP address
- Leave Enable PPPoE unticked for this guide.
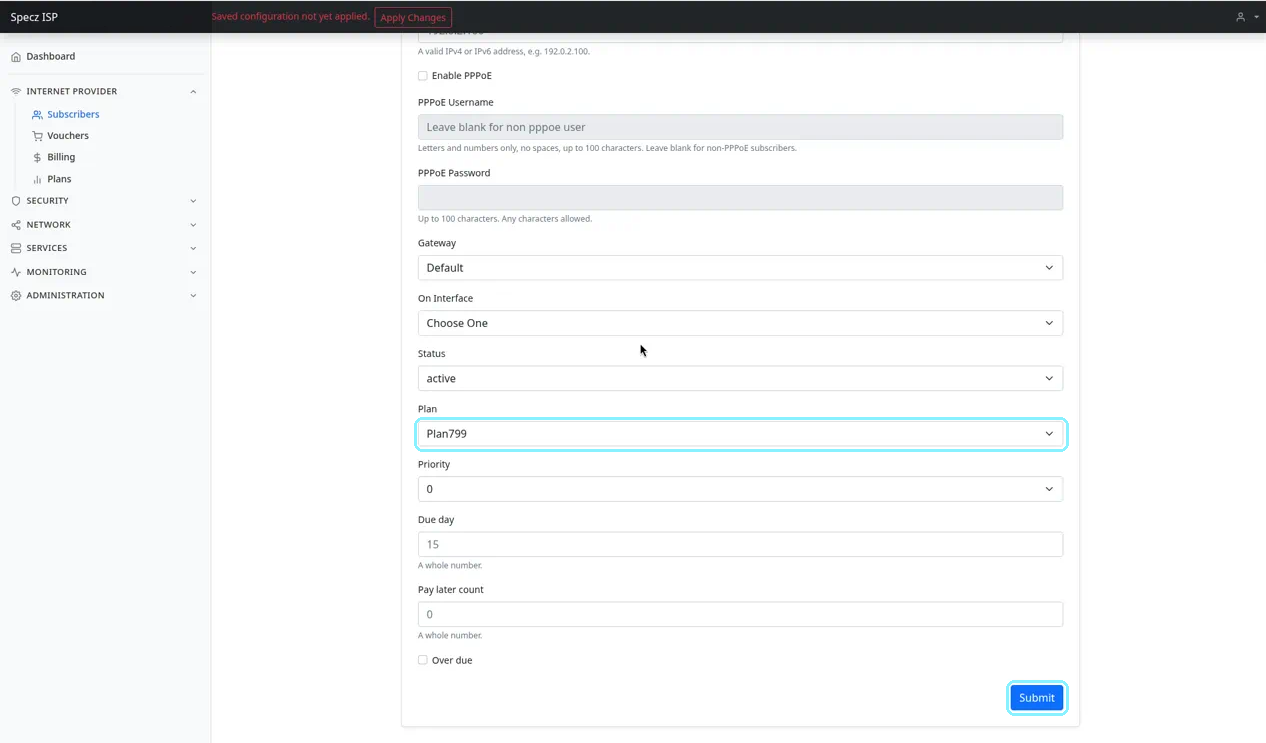
- In the Plan dropdown, select the plan you created in Step 1.
- Click Submit.


Apply your changes
After you save, the console shows a Saved configuration not yet applied banner at the top. Click Apply Changes to apply your configuration.
That's it. That's how easy it is to operate as an Internet service provider.